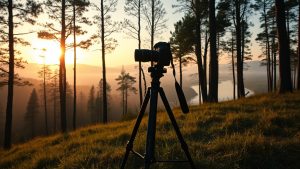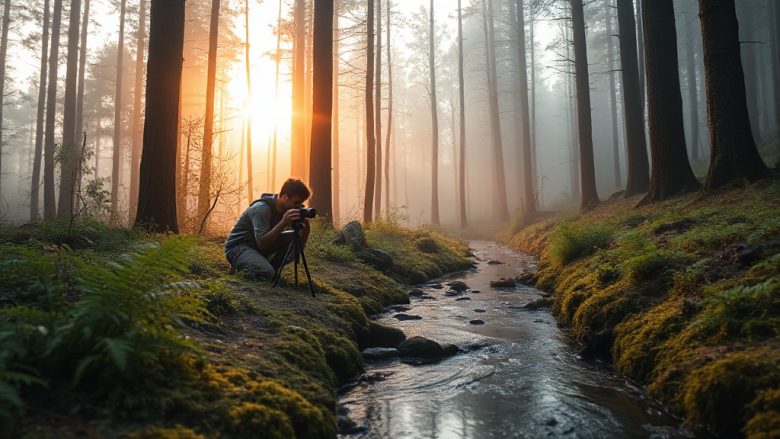
You’re standing in a cathedral of old oaks, mist threading through the branches, a woodpecker drumming somewhere out of sight. You raise your phone, tap the shutter, and look at the screen. Flat. Grey. The magic has vanished, and you’re not sure why. If that sounds familiar, you’re in exactly the right place. Understanding everything you need to know about nature photography isn’t about buying the most expensive lens or memorising camera menus. It’s about learning to see light, choose your moments, and respect the wild things you’re pointing a camera at. This article walks through the core skills, the gear that actually matters, and the ethics that separate a good nature photographer from a careless one. By the end, you’ll have a clear path to images that feel like the forest you remember, not the disappointment on your screen.
Start With Light, Not Equipment
Most beginners assume their photos look flat because their camera is cheap. Usually it’s because they’re shooting at the wrong time of day. Light is the raw material of nature photography, and the difference between a dull image and a striking one is often just an hour on the clock.
Midday sun is harsh and overhead. It bleaches colour, creates ugly shadows under every leaf, and makes wildlife look like it’s squinting. The two golden windows, roughly the first hour after sunrise and the last hour before sunset, give you soft, warm, directional light that wraps around subjects and reveals texture. If you only change one habit this month, make it this one: get out early, stay out late, and nap in the afternoon.
Cloud cover isn’t your enemy either. An overcast day acts like a giant softbox, which is perfect for forest interiors, waterfalls, and close-ups of flowers and fungi. The light is even, colours are saturated, and you don’t fight blown highlights in the sky. Learn to read the forecast and pick your subject to match the light rather than forcing a landscape shot into a bad sky.
Direction matters too. Front light is safe but flat. Side light reveals shape and texture, which is why it’s so good for tree bark, rocks, and animal fur. Backlight is the dramatic one. It rim-lights leaves, makes dew glow, and turns grasses into something almost abstract. It’s harder to expose correctly, but the payoff is worth the practice. When your camera struggles, expose for the bright edge and let the shadows fall where they may, or bracket a few frames and choose the best later.
Choosing Gear Without Wasting Money
Here’s the honest truth: a modest camera in the right hands beats an expensive one in the wrong hands every time. That said, some gear genuinely helps, and some is a trap for beginners.
Any modern camera with manual controls will do. A used DSLR or mirrorless body from the last decade is more than capable. What matters more is that you can change aperture, shutter speed, and ISO without hunting through menus, because nature doesn’t wait while you scroll. Spend a weekend learning those three settings until they’re automatic. That knowledge is worth more than any upgrade.
For lenses, a versatile zoom in the 18–55mm or 24–70mm range covers landscapes and general walk-around shooting. If wildlife is your passion, you’ll eventually want something longer, but don’t rush. A 70–300mm lens on a bright day can produce lovely deer and bird images, and it teaches you to get closer through fieldcraft rather than through spending. A sturdy tripod is the one accessory I’d argue every nature photographer should own early. It slows you down, forces composition, and makes sharp landscape shots possible in low light.
Beyond that, a few small things earn their place in your bag. A polarising filter cuts glare from water and foliage and deepens skies without editing. A spare battery and memory card prevent the heartbreak of a dead camera at the wrong moment. A microfibre cloth handles rain, dust, and fingerprints. And a simple rain cover, even a plastic bag and elastic band, has saved more cameras than any insurance policy.
What you don’t need: the newest body every year, a bag full of lenses you never mount, or filters that promise magic. Buy slowly. Learn what your current kit can’t do before you replace it.
Composition Basics That Transform Ordinary Scenes
Composition is where beginners gain the most ground fastest, because it costs nothing and works with any camera.
Start by asking what caught your eye. Was it the curve of a river, the pattern of ferns, the way light fell through a gap in the canopy? Name it to yourself, then build the frame around it. Too many photos fail because the photographer tried to include everything. Simplify. Move your feet. A step left or right often removes a distracting branch or bright patch that pulls the eye away from your subject.
The rule of thirds is a useful starting point, not a law. Placing your subject off-centre usually creates more tension and interest than a dead-centre bullseye. But rules exist to be broken, and sometimes symmetry or a centred subject is exactly right. Learn the rule, then learn when to ignore it.
Look for layers. In a landscape, a foreground of rocks or flowers, a midground of trees or water, and a background of hills or sky gives depth that a flat scene lacks. Get low to the ground for a fresh perspective; eye level with a mushroom or a stream makes the small world feel vast. Leading lines, whether a path, a fallen log, or the edge of a shoreline, guide the viewer’s eye through the frame.
Finally, pay attention to the edges of your frame. A stray twig poking in, a blown-out sky corner, or a distracting bright spot will quietly ruin an otherwise strong image. Check the corners before you press the shutter. It takes two seconds and saves hours of regret.
Wildlife Ethics and Fieldcraft
This is the part that matters most, and it’s the part beginners often skip. Nature photography is a privilege, not a right. The welfare of the subject always comes before the photograph.
Keep your distance. Use a longer lens rather than creeping closer, and if an animal changes its behaviour because of you, you’re too close. A bird that stops feeding, a deer that tenses and stares, a fox that abandons its route: these are signals to back off. Never chase, corner, or herd wildlife for a shot. Never disturb nests, dens, or resting places, and never use bait or recorded calls to lure animals into range. It’s not just unethical; it’s often illegal, and it teaches animals to associate humans with food, which rarely ends well for them.
Respect the landscape too. Stay on trails where they exist, don’t trample wildflowers for a better angle, and leave no trace beyond footprints. If you’re photographing in a sensitive habitat, learn the local rules and follow them even when no one is watching. The best nature photographers are quiet, patient, and largely invisible. They wait for the moment rather than forcing it, and they accept that some days the wildlife simply doesn’t show. That patience is a skill, not a waste of time.
Practice Tips That Actually Improve Your Work
Improvement comes from repetition, review, and a willingness to be bad at something for a while.
Shoot regularly, even when conditions aren’t perfect. A dull walk with a camera teaches you more than a perfect sunrise you never attempt. Give yourself small assignments: today I’ll only photograph textures; this week I’ll shoot only backlit subjects; this month I’ll return to the same tree at different times and watch how it changes. Constraints force creativity and build instincts.
Review your images honestly. Pick your three strongest from each outing and ask why they work. Was it the light, the composition, the moment? Then pick your weakest and ask what went wrong. Was the subject too small in the frame, the horizon crooked, the focus on the wrong spot? This habit compounds fast.
Learn a little editing, but keep it honest. Adjusting exposure, contrast, and colour to match what you saw is fine. Heavy manipulation that misrepresents a scene isn’t photography; it’s illustration. A light touch goes a long way.
Finally, slow down. The best images rarely come from rushing. Sit still for ten minutes and let the landscape settle around you. Wildlife often appears precisely when you stop moving. Carry a notebook or use your phone to record conditions, locations, and settings, and revisit the places that rewarded you. Over a season, you’ll build a personal map of where and when the light does something special.
Nature photography rewards curiosity more than gear. Learn light, buy slowly, compose deliberately, respect your subjects, and practise often. Do those five things and the forest on your screen will start to look like the forest you remember.
Frequently Asked Questions About Nature Photography
Do I need an expensive camera to start nature photography?
No. Any camera with manual controls, including a used body from the last decade, is enough to learn on. Your time is better spent understanding light, composition, and fieldcraft than chasing new gear. Upgrade only when your current kit genuinely limits you.
What’s the best time of day to photograph nature?
The first hour after sunrise and the last hour before sunset give soft, warm, directional light that flatters almost any subject. Overcast days are excellent for forests, waterfalls, and close-ups. Avoid harsh midday sun unless you’re deliberately using it for high-contrast effects.
How close can I get to wildlife without disturbing it?
If the animal changes its behaviour because of you, you’re too close. Use a longer lens instead of creeping nearer, never chase or corner animals, and never disturb nests or dens. The subject’s welfare always comes first.
How often should I practise to improve?
Regularly, even in poor conditions. Short, frequent outings with a specific assignment beat occasional perfect trips. Review your best and worst images after each session and note what worked and what didn’t. Consistency matters more than intensity.